Darkroom Photography
Photograms
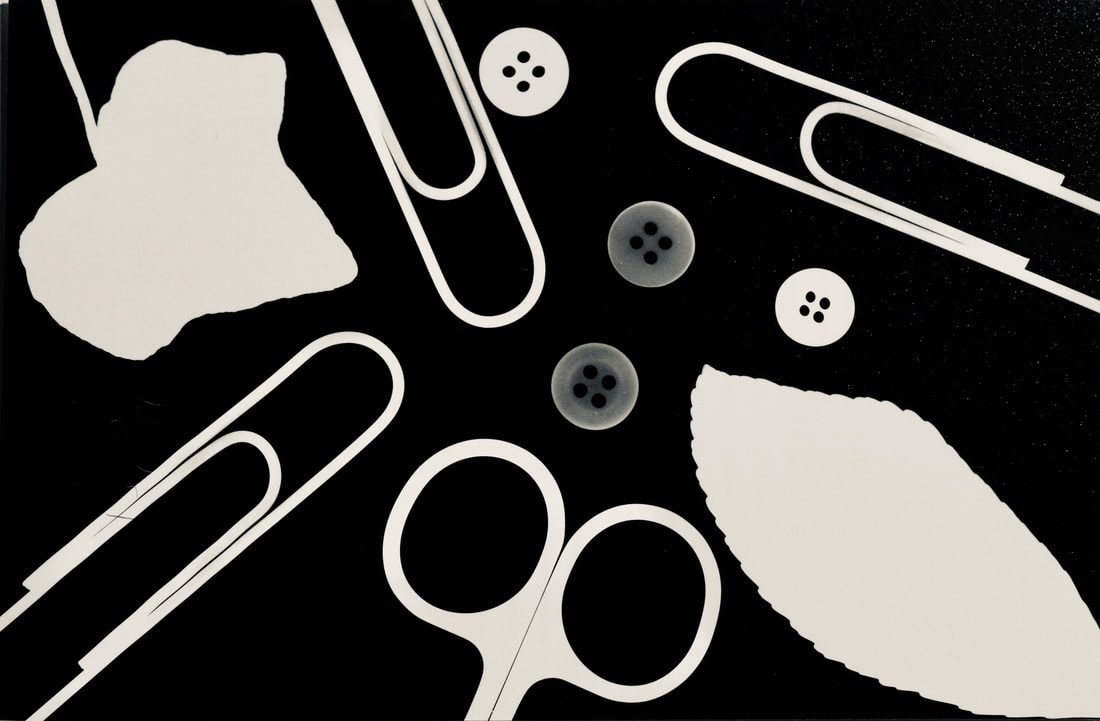
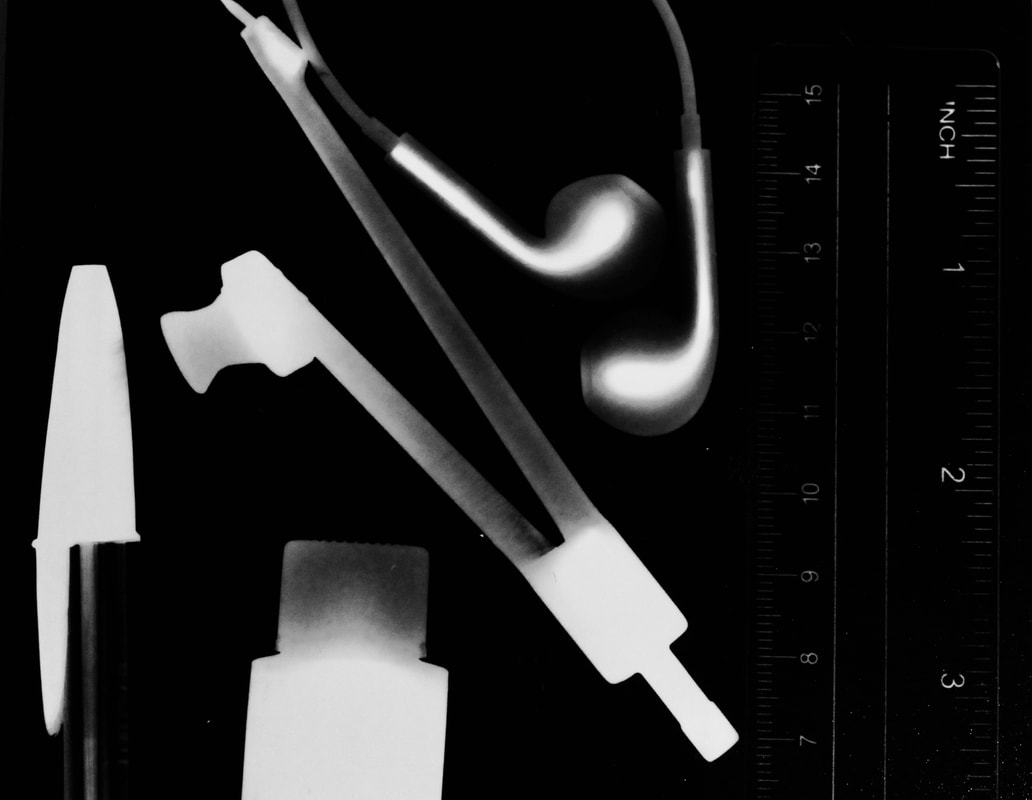
A photogram is a photographic image which is made without a camera by placing objects directly onto the surface of a photo sensitive material, like photographic paper and then exposing it to light. The objects that you use will vary in tone, depending on the transparency of the object. Areas of the paper that have not received white light, appear white whereas those that have, appear grey. I used objects like scissors, buttons, paperclips, rulers. I also used objects from nature, like leaves.
How to make a photogram:
How to make a photogram:
- Set the enlarger to F11 and raise or lower it to focus the light and in order to get the same size as your paper
- Then set the timer to as many seconds you want your photographic paper to be exposed for
- Place the photographic paper on the enlarger and make sure the shiny side is facing up
- Place your objects on to the paper and arrange them in different ways (to make it more interesting, you can use translucent and transparent objects)
- When you have placed all your objects onto the paper, get rid of the safety light (red light)
- Press the button to start exposing the paper with the objects
- After 4 seconds (the amount of time you set the timer), remove the paper
- Place it into the developer for 2 minutes, ensuring it remains submerged. You will start to see the picture developing.
- Then place it into the stop for 30 seconds
- Then place it into the fix for around 4 minutes
- Then place it into running water to get rid of any chemicals still on the paper.
- Take your paper outside the dark room and place the paper into the dryer.
|

|
|
Pinhole camera
How to use a pinhole camera:
I used a pinhole camera to capture a fixed image and then used the darkroom to develop the photographic paper. I tried various times to capture a person using the pinhole camera, but the pictures were always too light or too dark. I first left the flap open for 6 seconds but the image was over exposed so I tried it again for 4 seconds but it was under exposed. I tried a third time, for 5 seconds but it was under exposed again. I then tried capturing an image from a window looking outwards and I did that first for 6 seconds but it was over exposed, however, there were elements of the picture that got developed but it was mostly over exposed. I tried doing this again from the same point of view but I did it for 4 seconds and I am really pleased with the outcome because the image is very clear and it wasn't over exposed or under exposed.
- Get a pinhole camera and cut some photographic paper to put into the camera and make sure the shiny side is facing the hole (make sure to do this in the darkroom so that the paper isn't exposed to white light.
- Then close the lid and make sure the flap is also closed so no light can enter.
- Go to your location that you want to photograph in and make sure the camera is in a steady position, so that the camera does not move
- Open the flap and leave it open for the amount of seconds needed (depends on the lighting)
- Close the flap after as soon as the time has ended and do not open it again until you are in the darkroom
- Open the lid in the darkroom and put the photographic into the developer, stop, fix and then rinse it with water (like the photograms)
- Then you place it into the dryer
I used a pinhole camera to capture a fixed image and then used the darkroom to develop the photographic paper. I tried various times to capture a person using the pinhole camera, but the pictures were always too light or too dark. I first left the flap open for 6 seconds but the image was over exposed so I tried it again for 4 seconds but it was under exposed. I tried a third time, for 5 seconds but it was under exposed again. I then tried capturing an image from a window looking outwards and I did that first for 6 seconds but it was over exposed, however, there were elements of the picture that got developed but it was mostly over exposed. I tried doing this again from the same point of view but I did it for 4 seconds and I am really pleased with the outcome because the image is very clear and it wasn't over exposed or under exposed.
Positive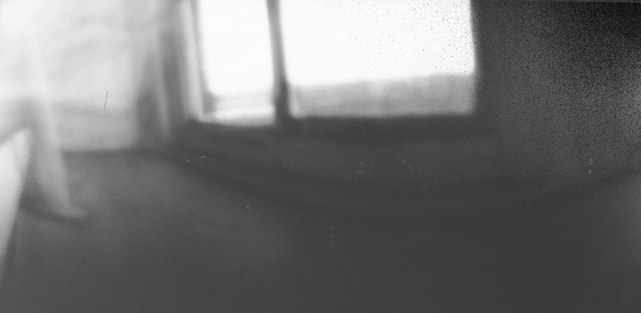
|
Negative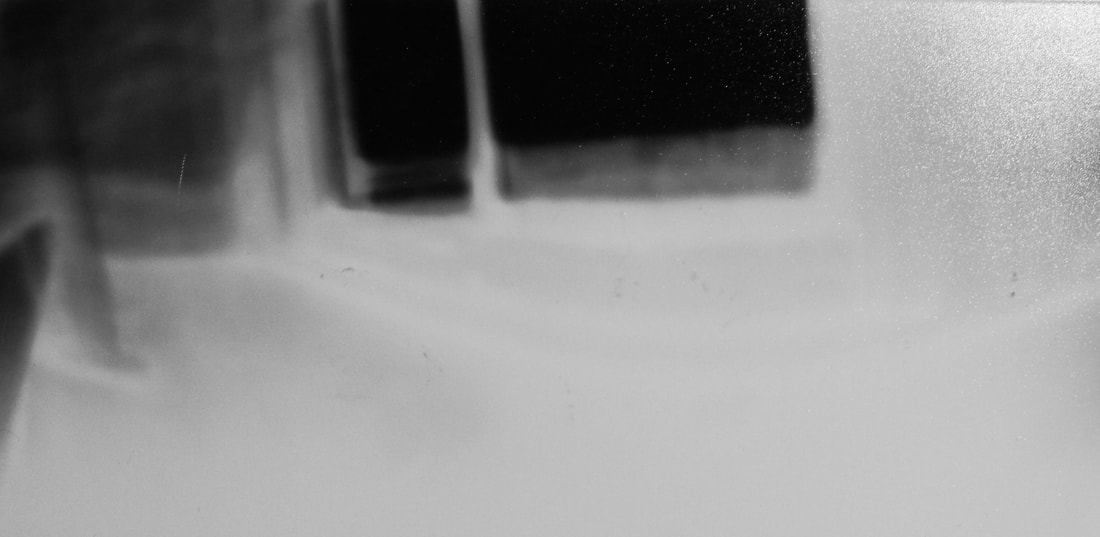
|
This is my first attempt at capturing an image from a window looking outwards. As you can see, the positioning of the camera was not that great, it was too low and you couldn't see anything outside.
|
Positive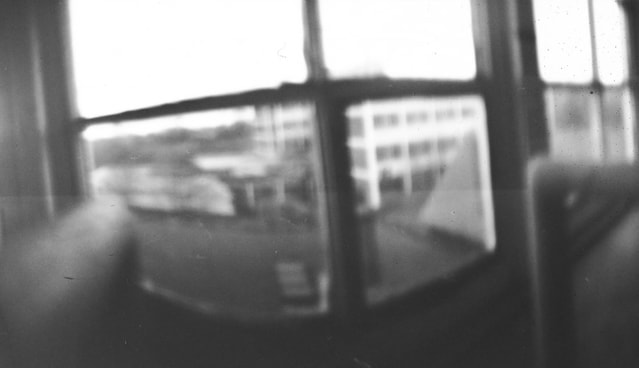
|
Negative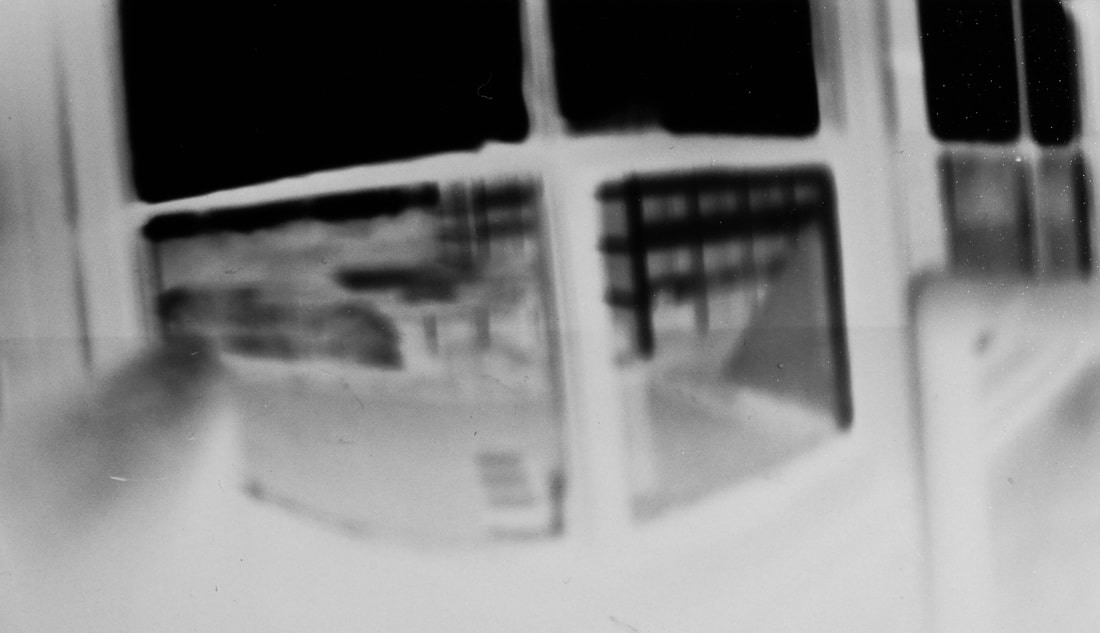
|
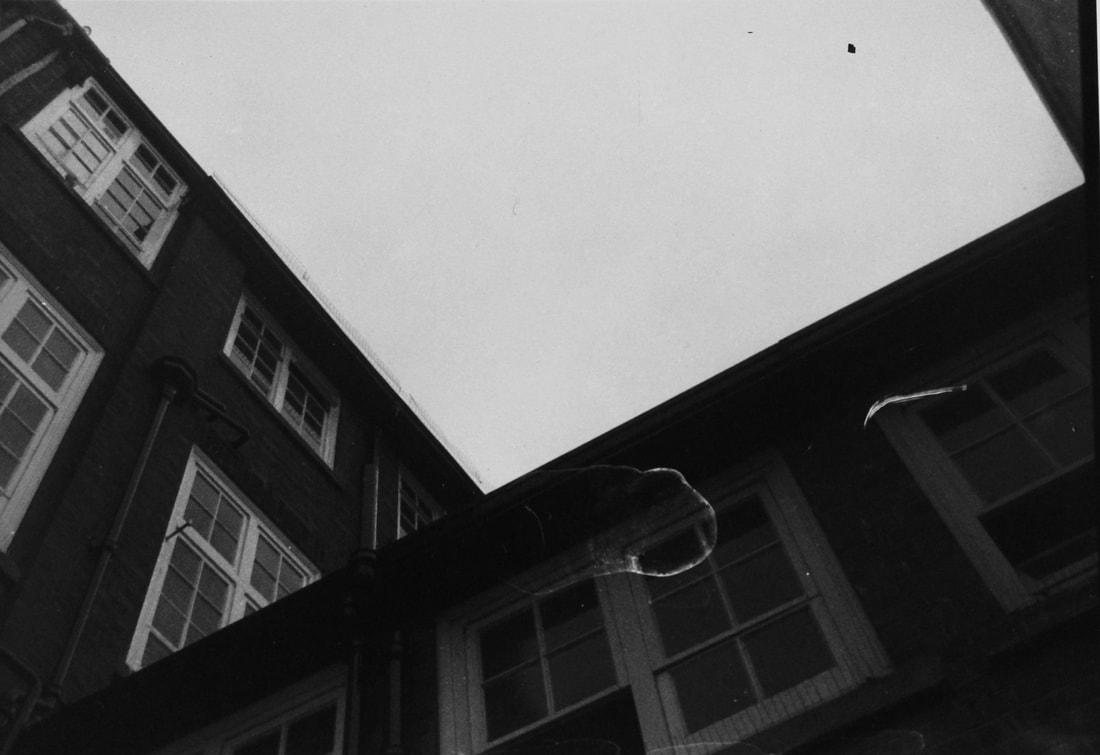
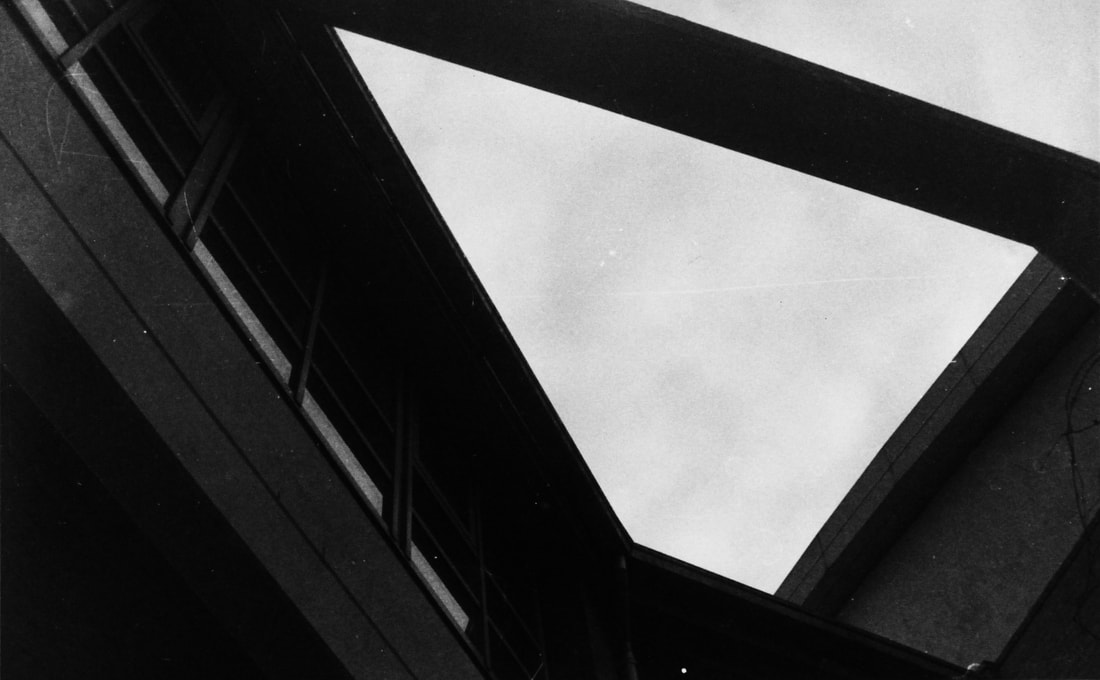
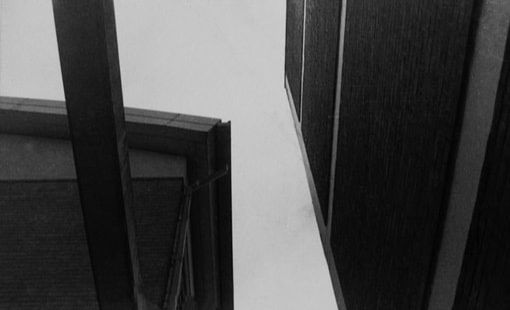
This is my second attempt which was much better than my first as I placed the camera higher in order to capture the outside. You can see the buildings outside much clearer and it is exposed the right amount. |
Film Camera
How to use a film camera:
- Firstly, load the camera with a roll of film with 24 on it by opening the film camera and slotting it in and pulling the film across.
- Then you can start taking your pictures by focusing the image and changing the ISO depending on the brightness of the day.
- Each time you take a picture, pull the lever back to be able to take your next picture.
- When you have used all the film, wind it up to make sure it won't be exposed to white light.
- Then open the camera and pull out the film.
How to develop your film:
- You need to do all these steps in complete darkness
- Make sure you have developer tank, column, reel and hat.
- Take about an index finger length off the bottom of the film, making the edges straight
- Wind the film onto the reel and
- Place the column on and put it in the tank ensuring the hat and lid are on properly before taking it back out to light.
- Then, you have to mix 30ml of film developer and 270ml of water into a beaker and pour it into the tank for 6.5 minutes, mixing it around regularly and banging it against a surface every minute.
- After 6.5 minutes, pour it out.
- Mix 15ml of stop and 275ml of water in another beaker and pour it into the tank for 30 seconds.
- Pour the stop out after 30 seconds.
- Mix 30ml of fix with 270ml of water in one more beaker and pour it in for 5 minutes swirling and banging every minute
- Pour the fix out after 5 minutes.
- Then fill the tank with water allowing it to keep overflowing for 5 minutes
- Pour around 3 drops of film rinse into the water left and urge the film in and out of the water a few times before taking it out, unravelling it from the reel, getting excess water off it and hanging it up in the dryer.
- Once it is dry, your film is ready to be enlarged.
|
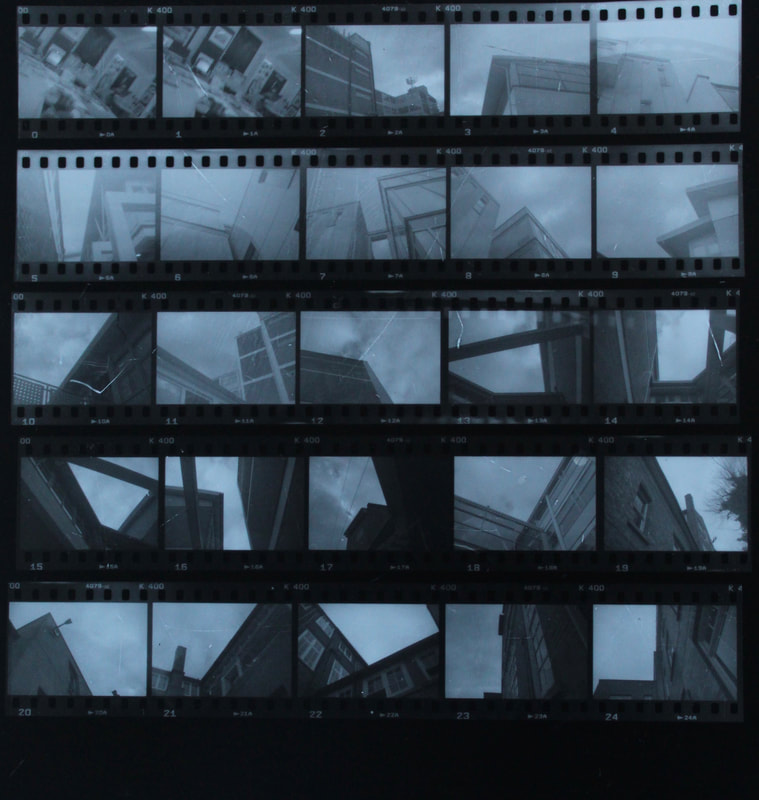
This is my contact sheet of the images I took on the film camera. To create this contact sheet, I did almost the exact same process for making photograms. I got my contact sheet and placed it on the surface of the enlarger. I made sure that the safety light was on so that the film was not exposed to white light. I used a test strip to find the right amount of time I needed to expose my contact sheet in order to get the best results. I tested 2,4,6 and 8 seconds and found that 4 seconds was the right amount of time. I got some photographic paper the size of my contact sheet and I placed it underneath the contact sheet. I then switched off the safety light and switch the lens to the white light. The timer was set to 4 seconds. I pressed the timer button and waited for 4 seconds. I then took the photographic paper and placed it into the developer for 2 minutes. Whilst it was in the developer, I made sure it was fully submerged. Then I put it in the stop for 30 seconds, and then the fix for 4 minutes. I then put it under water to wash off any chemicals. Lastly, I put it through the dryer.
|
How to enlarge your film:
- Firstly, choose the image you want to enlarge from your contact sheet and take the strip of film that has the image you chose into the darkroom.
- Then, pull out the slide of the enlarger and place your film into the slide making sure it is placed upside down and that the shiny side is facing upwards.
- Then I switched on the safety light to adjust the image and make sure it is focused.
- Use a test strip to find the right amount of time needed to expose your image.
- The best images were between 2 and 4 seconds. When I set it for 2 seconds, the image was a little too light and didn't have a lot of contrast, whereas when it was left to be exposed for 4 seconds, the image was a little too dark and also didn't have a lot of contrast between the negative space and the buildings. Because of this, I set my timer to 3 seconds.
- I placed photographic on the surface of the enlarger and switched off the safety light
- Then I switched on the white light for 3 seconds
- I then placed the paper into the developer, fix, stop and then running water.
- Lastly, I put it through the dryer
|
|
|
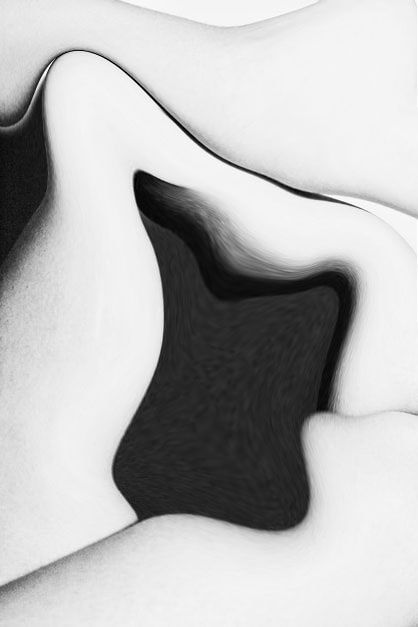
These 3 enlargements that I did had some obvious marks and small spots on them so I decided to open them on photoshop and get rid of them.
I used the clone stamp tool on photoshop which worked effectively to get rid of the marks, and the structures stand out more now as there aren't any marks which makes the viewer focus more on the actual structures.
|
|
|
|
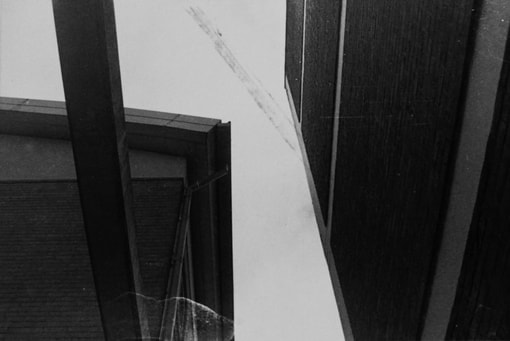
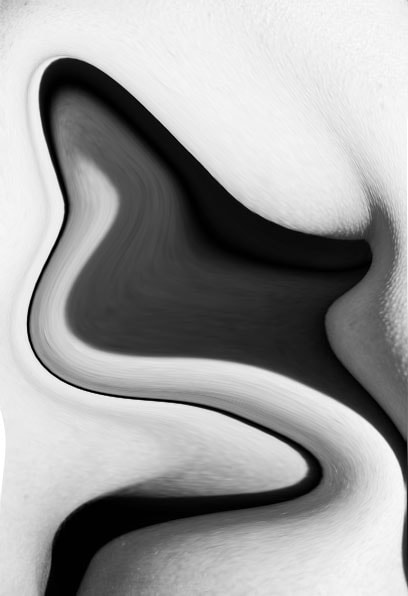
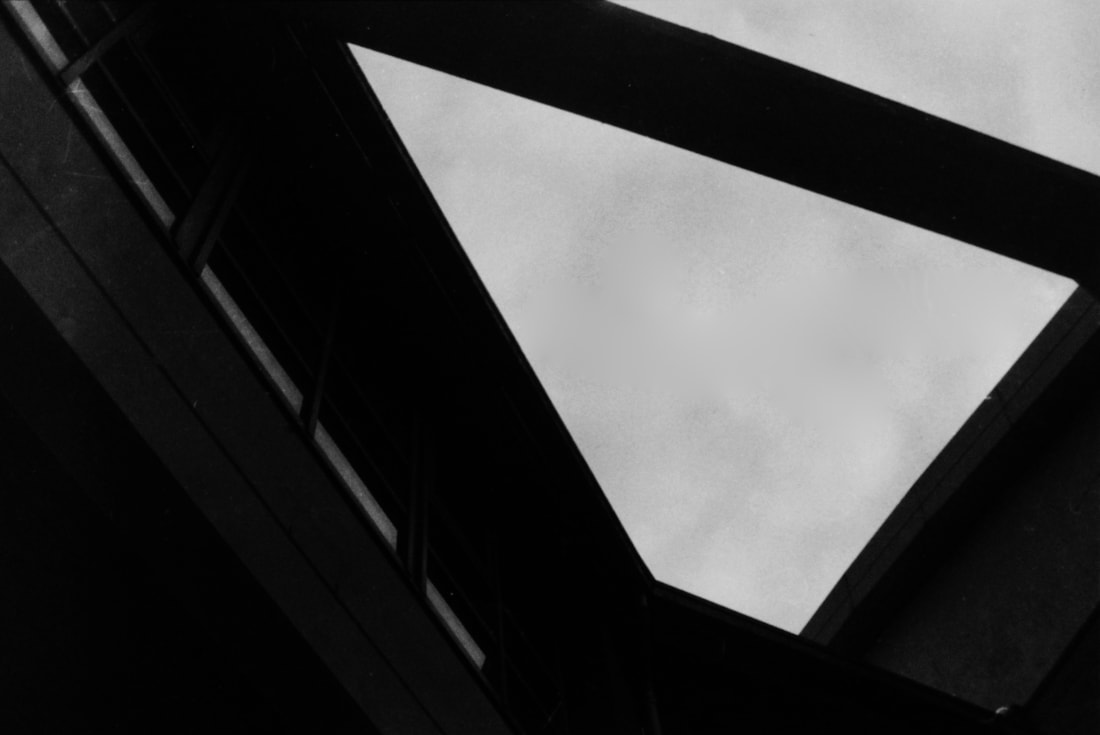
This is my favourite enlargement as I really like the shapes formed within the structure and I particularly like the contrast between the negative space and the building. To achieve such high contrast, I lowered the brightness and increased the contrast.
|
